[sg_popup id=”20526″ event=”click”][/sg_popup]
Robert Bergman cannabis seeds Amsterdam is my go to seed guy.
I just recently received a trial package of 12 seeds from another seed company consisting of 6 autoflower and 6 feminized seeds.
Out of the 6 auto’s, only 2 germinated and grew. The plants were small but the weed was good. I didn’t like the way the seeds looked and the germination rate is way to low. I would expect 5 out of 6 to pop.
Out of the 6 feminized seeds, 3 germinated and are growing now.
IMO, a 50% germination rate is too low so I’ll stick with Bergman.
You’ve probably ordered from RANDOM online seed guys before and have been burned. So, like you, I’m always cautious and with good reason. I happened to find this site; Cannabis Seeds From Robert Bergman in Amsterdam, by Robert Bergman and decided to make a small buy order to test the company.
I was really skeptical about if I’d even get the seeds worth such a small amount, but in no time at all, I was surprised to see I got exactly what I ordered, the seeds were perfect, they all germinated, the plants grew fine and the weed was great.
So I went ahead and gave it a go at a second-order that was larger which included 5 AK-47 auto flower seeds, and again my products were delivered perfectly and the seeds/plants/weed were all awesome.
Last I checked they were still offering guarantees and free shipping too; click here to buy seeds.
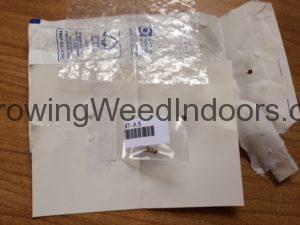
We’re all scared of getting ripped off, so it’s natural to keep a guard up for disappointment when ordering from a new source. Anyway, I’m happy to say the seeds from Bergman just arrived, December 8. They came in the envelope and packaged as shown in the images. I only ordered five seeds so I wouldn’t lose more money if the company turned out to be another quick cash grab.
It just eats at your moral when all you want is for these companies to follow up with honest business, but decide to take your money to never be heard from again. My first impression from this delivery was that these guys are the real deal. It was really cool to see I got exactly what I ordered, with some pretty fast and free shipping too.
- Seed Mailing Envelope
- Seed Packaging
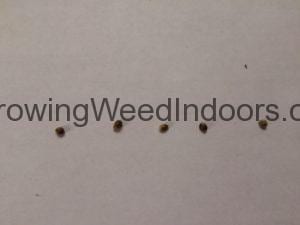
- 5 AK-47 Auto Flowering Seeds
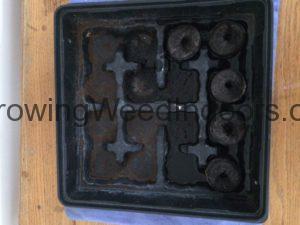
- I germinate in Peat Rings
I did a crappy upload for the five seed image, and you can’t see the last one. That seed didn’t look quite right. I’ll have to see if it sprouts or not. Update: it has sprouted and growing fine.
My choice for the AK-47 auto flower seeds was because of their fast rate of growth and low maintenance for light management would make it a very manageable project. Even if you’re a beginner who’d swear up and down that you don’t have that magic green thumb, you could grow these with so much ease it’s ridiculous.
HOW TO USE PEAT RINGS TO SPEED UP GERMINATION
I use peat rings to germinate my seeds. At one time I would lay out the seeds on a paper towel and keep them moist until they popped, but all that does is add another touch (I like to touch/move plants as little as possible) because you have to put them in something after they sprout.
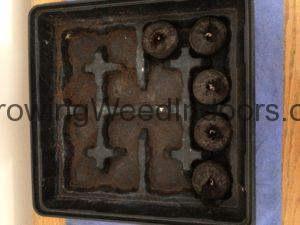
By using the peat rings, once they pop and grow a couple of inches, you can dig out some space in your larger seedling pot and plant the peat ring.The only touch you’ll have is when putting the seed into the ring the first time. The blue thing under the peat rings in the image is a heating pad. I’ve been using heat for a number of years and IMO; it speeds up the germination by a few days.
Be sure to check for moisture as the heating pad will dry your peat rings faster than normal. Do not let your seeds dry out during germination. I would love to hear your comments about your experiences buying weed seeds online. Use the comment box below. Use it for any questions you may have about growing too.
BEFORE AND AFTER UPDATES! (SEE PICS BELOW)
They’re Sprouting Quickly So far, so good; I ordered 5 seeds, got them in 20 days, immediately placed them in moistened peat rings and within 3 days, they have sprouted. Sprouting in three days is really excellent and in my opinion, using the heating pad under the peat rings is the reason why. It’s simple to do and it will save you at least 3 days if not more. When I didn’t use a heating pad, seeds normally sprouted in around 7 days and many would take even longer.
Keeping Up With The Seedlings
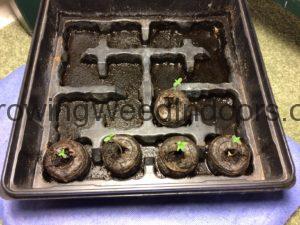
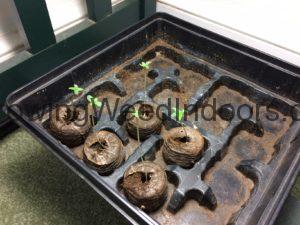
Upon delivery, Thursday, Dec. 8 I immediately placed the seeds in moistened peat rings. The first photo in the gallery showing them popped was taken three days later on Dec. 11. The second photo was taken 2 days later, on Dec. 13, You can see the seedlings at about one inch tall. The third photo was taken Dec. 15, one full week after seed delivery. You can see the growth is going great and it’s only been 7 full days. I still use the lowest setting on the heating pad, checking continuously throughout the day making sure they stay moist.
Need quality seeds? Give these guys a try I trust them to come through for you.
Make It Rain With Chlorine-Free Water
IMO, the best way to keep them moist after they are in the couple of inches tall range is using a spray bottle. I give a couple of light sprays three or four times per day. I’ll be transplanting them in a little larger pot in another day or two. I’ll start with my soil blend moistened with water mixed with my nutrient blend than spray them a few times each day with plain water for a while. I have well water and don’t have to worry about chlorine. I strongly suggest for city water users, fill your jugs with water and let them sit for a couple of days so the chlorine dissipates.
Using Nutrients Is Good For Your Seedlings
don’t believe that using nutrients on seedlings or clones hurt the plants. I’ve proved it with dozens of grows. My clone success rate increased from about 60% using plain water to 99% using water with nutrients. Before using nutrients, I wouldn’t even bother using a clone smaller than 6 inches. Now I have success cloning 2-inch stems, and IMO, it’s from early use of nutrients. Of course don’t go over-board, follow the directions and ERROR on the side of caution.
- Seeds Popped In 3 Days
- Seedlings 5 Days Old
- Seedlings 7 Days Old
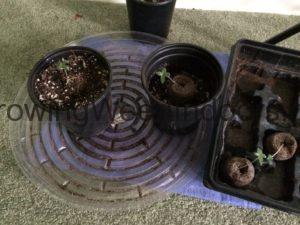
- 9 Days Old Transplanted
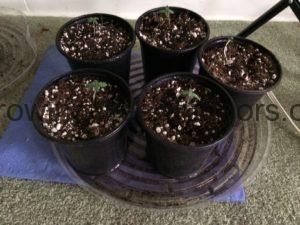
- 9 Days Old All Transplanted
PLANT UPDATE JANUARY 1
HAPPY NEW YEAR TO ALL THE READERS OF HOW TO GROW WEED INDOORS
Thanks for keeping up with this website. The plants are really growing great.
If you want guaranteed shipment of quality seeds to grow your own check out Robert Bergman’s site.
Fast recap:
●Ordered five, AK-47 Auto Flower seeds on November 18
●Delivered on December 8
●All seeds popped (germinated) in 3 days
●Seedlings in peat rings transplanted to small pots on December 17, 14 days after germination
●Plants looking great on January 1
How I’m Managing PH Levels
All five plants are doing well. I use ProTekt with all my plants for a heartier stem and leaf to make it more difficult for critters to chew the leaves. Since my soil mix was used before and ProTekt can affect the PH I make sure I check it. I want my PH between 6-6.5. I’ve grown between 6.5 and 7 and find the plants grown with the lower PH soil are better plants.
I use Dyna-Gro PH Up or PH Down depending on what I need. When adding Up or Down I suggest to use around 2 ml at a time mixing it in a gallon of water.
Progress On My Watering Habits
As mentioned before, I also use nutrients in the early stage as well as keeping the plants on a heating pad. The proof is in the pudding; look how nice the plants look in the two images. And of course a 100% success rate so far. During this stage of plant growth, after my initial watering with the 1 tsp of ProTekt and 1 tsp of Foliage Pro, the second watering, I used plain water and I’ll do the same for the third watering. These cannabis plants are growing great!
If you want to grow, get your seeds from here.
Mixing It Up With Plain Water
In between watering, I spray the leaves with plain water. NOTE: I have well water. If you are using city water, I strongly suggest keeping gallon jugs full of water on hand to give the chlorine a chance to dissipate before using. These plants will be transplanted into their for-ever home a little after their third watering. I like to transplant when the soil is damp; makes it easier to get the plant out of the smaller pot without damaging the roots The plants are growing well, great color, sturdy, upright and not stretching. I attribute this to using a mix of LED lights and CFL’s, heat and nutrients during the early stages of growth.
The Plan For Transplanting
When I transplant them into their 5 gallon permanent home, I’ll use 5 gallon fabric grow pots. When it’s time to water I’ll place the fabric pot into a 6 gallon plastic pot because fabric leaks. Once the water settles, I’ll take it out and place it on a saucer.
Find everything you need to grow weed from Robert Bergman’s site.
PLANT UPDATE JANUARY 4 Lights Out Temporarily
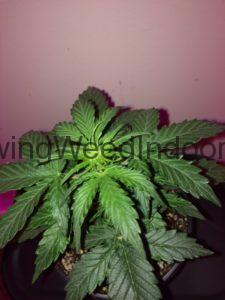
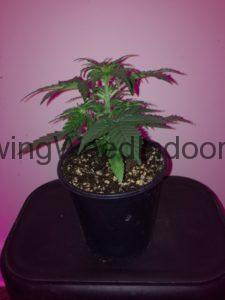
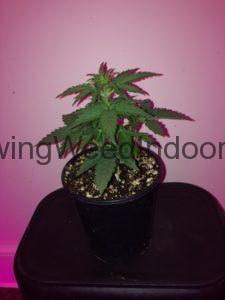
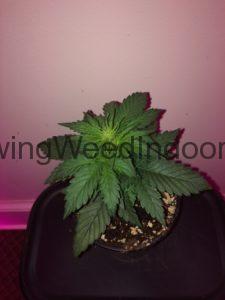
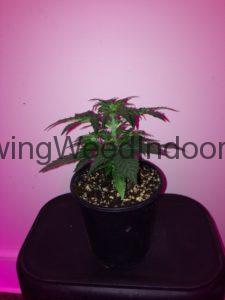
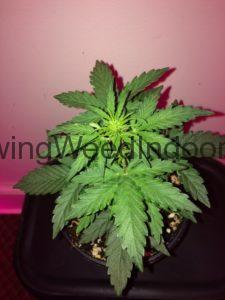
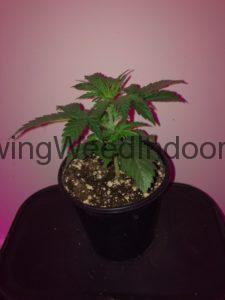
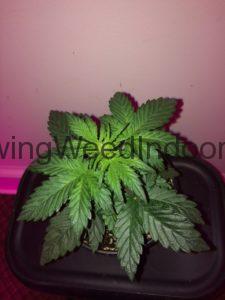
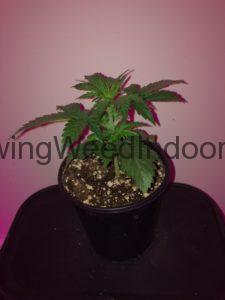
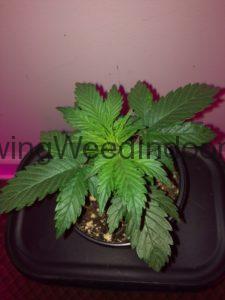
Majorly disappointed in my 1600 Watt LED light from King; it’s only a year old, and four rows of LED’s, right in the middle of the light are out. I have no idea what happened. I’m kinda handy. Hopefully, I can fix. But I’m pissed. Grow lights should be made to withstand the work load. Plants are growing very well, little buds are forming; it’s only been 24 days since they sprouted. All the plants are about 5-1/2′′ tall and the stems are really sturdy. In about five more weeks, I’ll probably be able to test a sample.
Drying Out A Sample Buds
To dry out brand new buds, I use an oil-filled space heater. Click that link for more info but in a nutshell; first I put down a sheet of white copy paper, place my wet buds on top and cover with another sheet of copy paper. To seal the deal, I use a local magazine type newspaper on top of that. You have to watch closely, takes from about 20 to 45 minutes, but this is by far the best way to dry out bud when you’re in a hurry. If you go too long, your weed will be really dry. NOTE: nothing beats natural curing.
- Plant One 24 Days Old
- Plant One Side View
- Plant Two Side View
- Plant Two 24 Days Old
- Plant Three Side View
- Plant Three Top View
- Plant Four Side View
- Plant Four 24 Days Old
- Plant Five Side View
- Plant Five Top View
Read the second page of this grow journal. Read the third page of this grow journal. Read the Epilogue here


[…] seeds. Regular seed will give you a larger, more robust plant that you can easily clone. Check out this link to find out where I get my marijuana […]
[…] Robert Bergman Cannabis Seeds Amsterdam […]
Nice article
Thanks!!
Im very satisfied with this seed co. My first order failed to germinate. Bergman seeds replaced my order without question. My replacement seeds all germinated & growing nicely. A+++ company to do business with. Jim W.
Thanks for stopping by James.
I’m glad Bergman came through.
One thing I’ve learned to do is to sacrifice one smaller female by pollinating her and harvesting my own seeds.
It’s easy to do but of course it has to be a female grown from a regular seed; you can’t clone or get seed from an auto or feminized plant.
This might clear something up because I heard somebody who claims to know a lot about growing weed say this; he claims you get female seeds from regular female plants. LMO – Seeds are a 50/50 proposition, some will grow female plants and some will grow male plants.
Thanks again for coming over.
Vince